Waistcoat and Poet Shirt
"I have no sympathy for any of you feculent maggots and no more patience to pretend otherwise. Gentlemen, I wash my hand of this weirdness." ~ Jack Sparrow
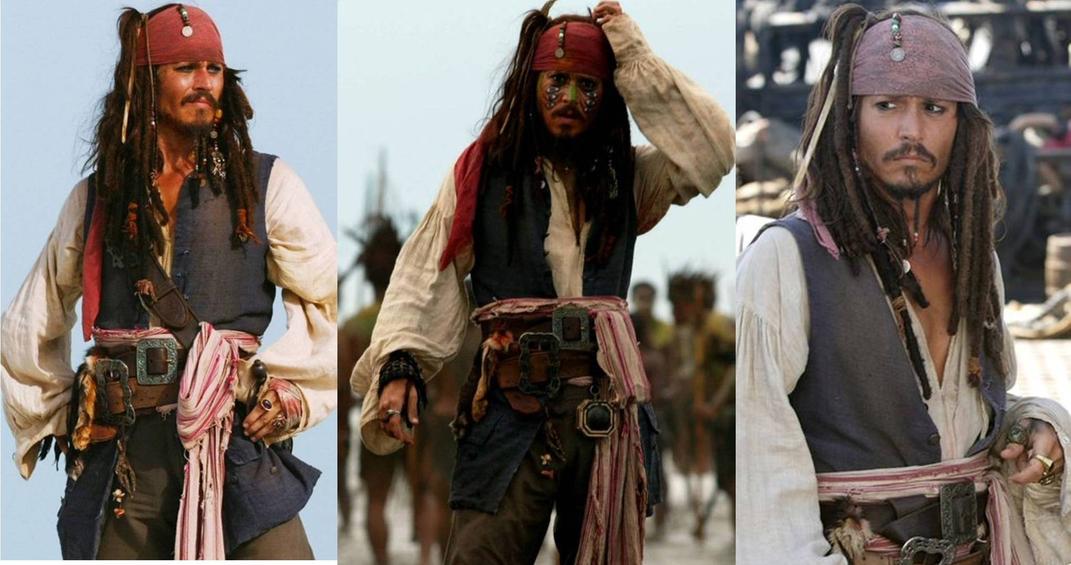
Jack always wears a faded 12-button aubergine [blue] 18th century waistcoat with a shorter linen back as a part of his costume. This outfit is worn through most of the series and is called the "hero costume." Underneath the waistcoat he also wears a torn linen, drop shoulder white undershirt. The cuffs are always unbuttoned and Jack leaves them open. His shirt is open down to his chest, and has a two 16" long ties that hang from the collar down both sides of the collar.
Fabricating Waistcoat
-
Make sure you always have good, clean reference pictures. (POTC) (DMC and AWE)
-
The back of the waistcoat is a striped pattern on a natural tone. (ref pic)
-
The buttons on the pocket flaps are actually under the flaps and do not "technically" button.
Waistcoat Pattern:
-
Longago has patterns for both the waistocat and the poet shirt
-
JP Ryan historical pattern
-
Harriet's Colonial Patterns.
- McCalls Pattern #M5446
- Simplicity Pattern #4923 or search the pattern books at your local fabric store for halloween or renaissance clothing.
Waistcoat Buttons:
-
The screen used waistcoat has 18 JHB "silversmith" buttons [size 5/8] down the front and pockets.
-
You can purchase the Silversmith Buttons from House of Anoria - Top Notch Costumes - Twin Rose - Simon Newton - Textile Gardens (#TGB116) and By Michelle
-
If you are a wholesaler, you can buy these Italian made buttons at JHB Int.
-
Some costumers use patina to age the buttons on the vest - Here are detailed instructions how to patina a brass surface.
-
Other weathering methods to weather buttons can be use copper spray paint, ammonia, sophisticated finish patina, rub n buff, or nickel black.
Waistcoat Weathering:
Fabricating Linen Shirt
- Simplicity Pattern #4923 (review)
- Longago has a pattern for a trade shirt. Make sure you design it so that it is off the shoulder with a traditional shirt collar.
- Linen shirt reference picture
- Costumer Manifesto for weathering a men's shirt.
- A careful observation of the silk shirt reveals a tear under the neckline on the left side and also a small hole.
- Pauliepoos (Paulette Vidos) makes the most screen accurate Jack's shirt - Highly Recommended!
Dressing Tips
-
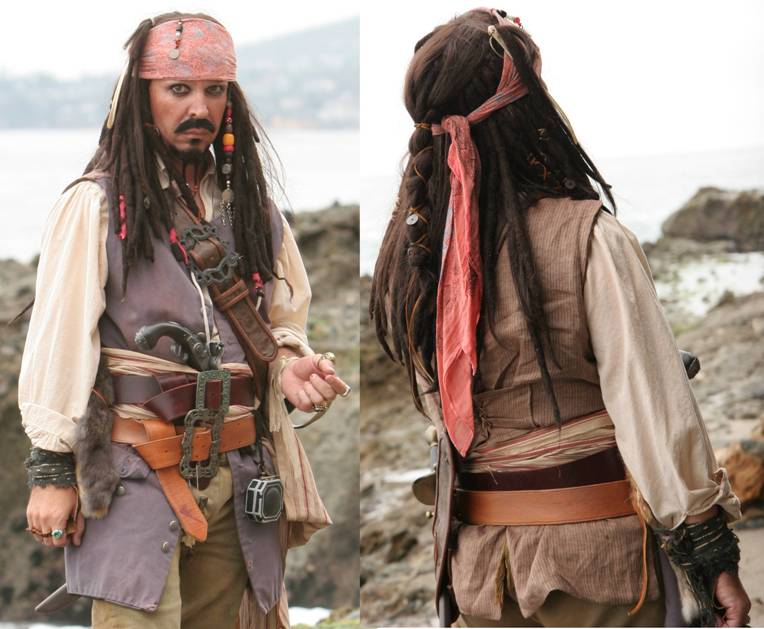
Your waistcoat should be pulled back on both sides allowing your shirt and chest to be seen. Jack's vest sides don't often touch each other.
-
Also the backside of the waistcoat should be seen from under your belts - meaning - your belts are worn above your waist and not where a typical "pants belt" would be worn.
-
Your poet shirt "V" neck should be deep, don't be afraid to show some skin.
Commandeering
You can find the shirt and vest at the following vendors:
-
Sara Fay Tailoring
-
Top Notch Costumes
-
Costume Base
-
Yordreem Creations
-
Sith Camaro
-
Pirate Empire
-
Empire World-Wide
-
Pauliepoos1 - shirt only!
Waistcoat Tutorial
"Well that's even more than less than unhelpful." ~ Jack Sparrow
Tutorial by Mojo from brethrencourt.net
A strong element of the Hero costume is Jack's waistcoat. With the exception of the AWE locker scene and the COTBP island scene, Jack always wears a dirtied, faded 12-button aubergine [blue] 18th century waistcoat with a shorter linen back. Not to be confused with the color blue, aubergine is almost an eggplant color; so closer to a purple shade and less an actual strong blue.
I started off my project with the costumebase waistcoat and an old waistcoat tutorial (lost at sea). If you only had those two items and some reference pictures - you'll do just fine. If you want to keep reading - be my guest. This is written with the understanding that your waistcoat is completed and just needs to be weathered. There are plenty of waistcoat patterns here on the waistcoat page (above) if you want to make yours from scratch. Or, if you'd rather buy yours made and finished, Yordreem makes the best around. (to see larger images, select 'open image in new tab')
A new costumebase waistcoat looks like this:
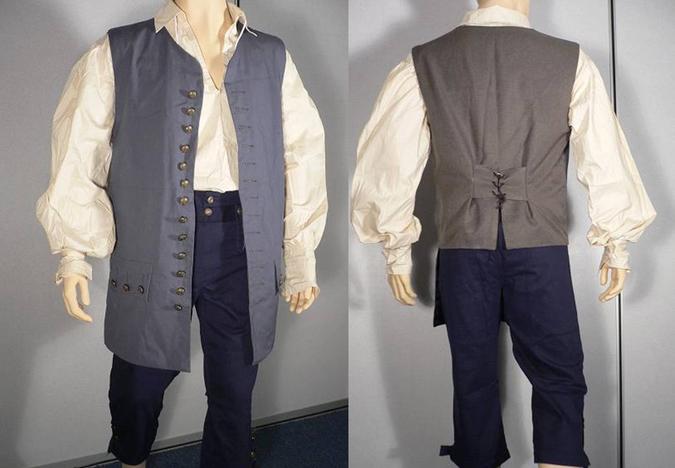
I originally chose it because it was the right price and a "close to" right color. Most could leave it exactly the way it is and you'd have a pretty close waistcoat plus more time and money then if you made it yourself. To take it a little to the next level, you could add the silversmith buttons, weather it or change out the back, but it will all depend on how much you are willing to invest. In this tutorial we will be taking it all the way from store bought to screen accurate.
Weathering
So the first thing I did was just wash the vest over and over. Every time I did a load of laundry, the vest went in. I wanted to loosen and soften up the fabric as much as I possibly could. Your costume should feel like you wear it all the time. Costumes often feel like new clothes and they smell like the factory where they were made. Your clothes should feel and smell like you. The more comfortable you are - the better you will feel and ultimately the better you will come across.
Then, I started in on the hard-core weathering. The first thing I started doing was making all the holes in the vest. Use this chart to determine roughly where Jack has his holes. I used a small screwdriver to make the hole and then I went over it with sandpaper until the hole grew bigger and rattier.
.jpg)
Everytime I got the vest wet - I hung it in the sun to dry. The effect you are after is UV rays and not necessarily "drying time." Sure, the dryer is faster, but UV rays help bleach out the color and give it that aged look. Another thing that helps bleach the color is using actual "bleach." Using a little bleach diluted in water in a spray bottle I would come outside and spray the front panels lightly with the solution and then allow the sun to dry it. The sun kept fading the color with the help of the bleach and then I stopped when I had the color and effect that I wanted.
The key places to hit with the bleach for me were the "sweat areas" under the arm pits, around the neck and down the back. And then the centers of the left and right front panels and the pocket flaps. Let me assure you, I didn't use a lot of bleach over all, but I did do many applications, a little here and there until the color was just right. I probebly used 2 cap fulls in a full spray bottle full of water; and the whole process probably took two weeks of just constant wetting and drying.
The bleach really helps bring the purple color out more. The last thing I did was add my "dirt effect." I did this by diluting brown leather tanner in water and painting it on with a foam brush. I did this in the same places that I had faded with the bleach [take color out - put color back]. I then dried the dye in the sun and then went back over the whole thing with sandpaper to rough it up.
Waistcoat Back Replacement
Ok so that was just the front, now I have to re-do the backside. Looking at some reference features, I went to a fabric store and bought a new backing linen and a liner. Always make sure you are buying 2x the fabric length so that you have enough for the insider liner.
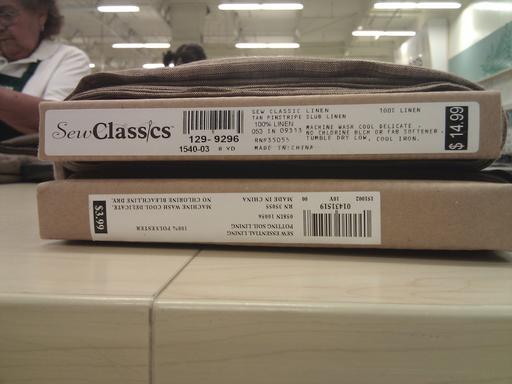
Since I never bought a pattern, I am going to have to do a few things. First put the waistcoat on, plus my belts and sash and eyeball it against reference pictures to determine how much longer I want the new back to be. My current costume base back barely peeks out once the belts and gear are on, and I am thinking I need at least three inches more in length.
The second thing will be to take the old backing off carefully with a seam ripper and then using it as a template to make a new pattern. This was done by first putting the entire costume on and noting where things should be broader or longer; and second what over-all changes needed to be made. My waistcoat needs to be a tad bit longer in the back and it needs the side panels to be split in the back and on the sides like the original.
Next, we took a seam ripper and took the entire thing apart.
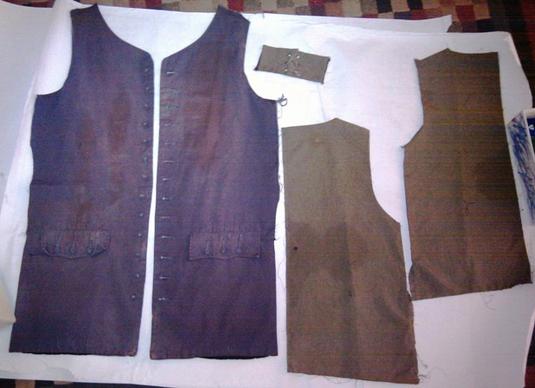
Adding the split side look that Jack's waistcoat has.
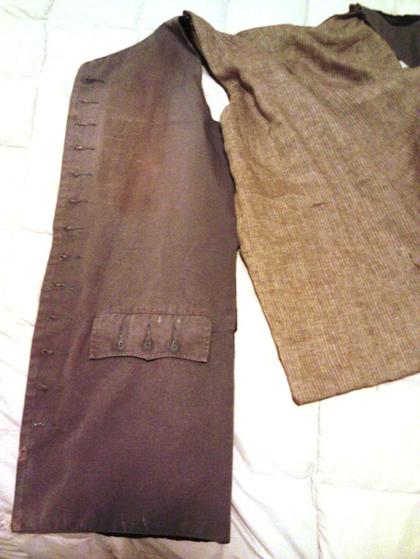
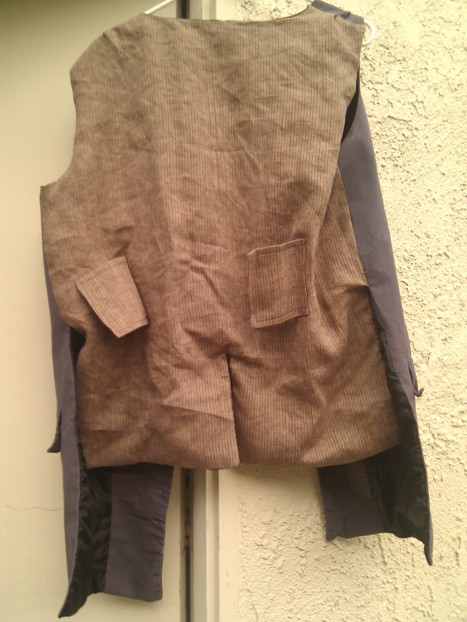
Adding the backside tie backs - I am putting in rivets, but it has been suggested that if you have time, button holes would be more "period accurate."
Button Replacement
The last part is going to be to replace all of the costume base buttons with screen accurate buttons from JS Newton
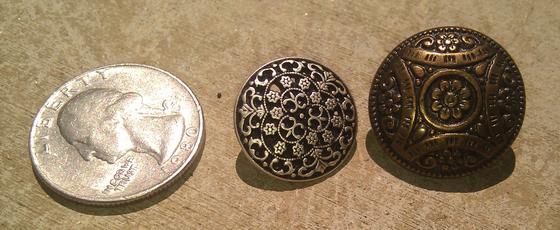
Added the silversmith buttons on the front and the leather tie in the back.
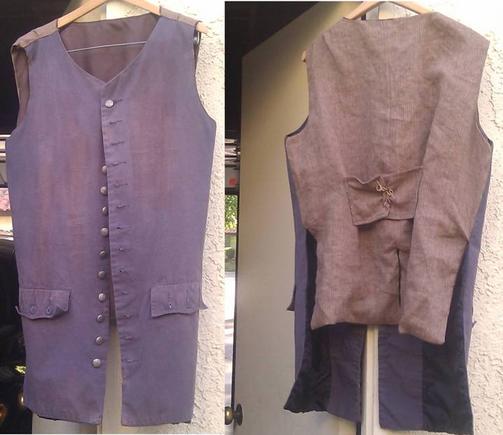
On a side note, make sure that when you replace the buttons, you add the pocket buttons below the open flap. No, they will in no way be able to "button back up again" but that is how Jack has them.
Venture below for the forum of The Brethren Court!
If you would like to add information or you find dead links to pictures or sites please send an email to the administrators

