Venture below for the forum of The Brethren Court!

If you would like to add information or you find dead links to pictures or sites please send an email to the administrators
![]()


Venture below for the forum of The Brethren Court!
If you would like to add information or you find dead links to pictures or sites please send an email to the administrators
Flintlock Tutorial (plastic)
(note: Flintlock Tutorial (wood) can be found lower on this page)
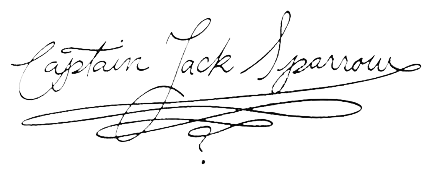
"Seeing as there's two of us, a gentleman would give us a pair of pistols." ~ Jack Sparrow
Tutorial by Mojo from brethrencourt.net
FLINTLOCK TUTORIAL - ZIZZLE TOY REPAINT
There are still a few dealers out there still selling the plastic zizzle toy flintlock. And now after having held it, I can tell you it's a nice size and weight. This is certainly too big a "replica" for a child and I would argue as close to Jack's actual gun for the price bar none. It originally looks like this when you get it. (to see pictures full size, select 'open image in new tab')
And as an added bonus, the flintlock comes with a "plastic version" of the Empire Jack belt free of charge (that's a joke).
So the first thing was I naturally took everything out of the box and what you're left with is this.
I knew that I wanted to do very broad painting, and not spend so much time with a brush doing detail work. So I decided to take as much as I could apart with a phillips screwdriver. The more I could disassemble and paint separably, the more time I would save in the long run and the cleaner my paint job would be.
With the first set of five external screws removed it looks like this. The plastic "but" comes off and so does the orange plastic tip. At this point you may decide to leave the tip off and leave the gun with a hollowed out barrel look. I am going to leave it in as Jack's actual gun has that added extension on the front. Maybe you are a wizard at the drill and decide to hollow it out? That's an option, but I was too afraid I would break it. I then went a step further, and removed the trigger, the trigger guard and the two screws holding down the hammer pin and removed all of those pieces as well. Setting them all aside, I was able to paint them silver. Make sure you paint the ornate oval as well.
That left me with the two larger halves of the gun. Rather than spending the time to "paint wood grain" effect. I decided that grain is a "feel" of grooves, not an effect. So I took lightweight sandpaper and went over all of the brown parts to rough it up. My gun has been dropped on the ground, dropped in the ocean, eaten by a Kracken and left out in the sun on the beach, so I want it to look worn and old.
Once that was done to both sides, I then sprayed each piece with a nice even spray of dark brown.
That was just a basecoat, a close look at Jack's gun and it's more of an oil worn black.
So I went over both sides with a very light "distant" black mist. So now before I began to paint the gun halves with silver, I took the same sandpaper and sanded off the zizzle and Disney trademarks that were raised letters on the hammer side of the gun.
With the same flat black, I went over all of the detailing in the silver pieces; and then I went back over them individually with a paper towel to rub off the the excess paint. This was just to put the paint into the cracks and grooves to give each piece an aged "power burn" look.
Now it was time to paint the silver parts on the gun while it was still in two halves.
Mask off the parts to remain brown
Paint the silver
Then I put the whole thing back together, This was a good time to go back to my previous pictures to remember how the trigger and the hammer were set in there. And with just the initial screws back in place, the flintlock looks like this so far...
Next, I filled in the five screw holes and the dice shape speaker holes: this is something that I did with the sword as well. This time I used Elmer's wood glue and poured and wiped the excess away until I had filled each cavity. If you want to be able to get inside the guts of the gun again, I do not recommend doing this. I also filled in the battery housing screw by the trigger guard and some of the extra "gapping" around the battery cover.
My almost last job was to finish the silver detailing on the side inlay. I did this by spray-painting a foam brush and lightly touching the raised detailing. And then with any "excess" that got into the brown areas I didn't want it to, I spray-painted the tip of a q-tip brown and "dabbed" over the extra color to hide it.
To finish I sprayed the whole thing with ceramcoat matte spray to seal the paint job and protect it.
Completed Prop
Dressing Tips
The gun is tucked into the sash behind the sun belt up to the trigger guard, with the butt of the gun pointing to your right.
And here is what it looks like with the rest of my costume:
Flintlock Tutorial (Wood)
Wooden Homemade Jack Sparrow Flintlock Tutorial by Stephan *
After playing with my Zizzle Pistol I thought it's could be a bit heavier. So I started with the butt cap
1. First step: Steal some Lego bricks from you kid and build a little frame.
Get some shoe polish and apply it on the plastic butt cap - not to much - you don't want to loose any details. Mix up some fine grain gypsum and fill it half into the frame - knock it on the table to let the bubbles go. Apply directly some Gypsum with a brush on the deeper areas of the toy butt cap. Put the butt cap with the face looking down into the gypsum - don't do it face up like I did in the picture.
2. Second step: after the first half dried apply some shoe polish on the gypsum also and fill up the form completely.
Let it dry for a couple minutes - the Gypson will get hard very fast. Then, open the two halves CAREFULLY and remove the toy cap gently.
How to Melt Tin: I am using a gas torch and a cheap soup ladle:
My tin is around 30 years old - I used it when I was a boy to pour tin soldiers - it was called "pure tin" - so very less lead inside. Thick parts like the trigger guard I cannot bend with my hands but I can scratch it with my strong finger nails under high pressure. You can use Zamak instead of tin which is much more harder and just need some Fahrenheit more to melt down. All Denix guns are made of this stuff. I melted some old die-cast Matchbox cars too - the zinc is very hard but not liquid as tin. You need to use centrifugal casting for good results. Further zinc is producing acrid fumes when melting - this can harm you (metal fume fever). So tin is great for deko parts - for working parts I would recommand Zamak. Zamak is an alloy made out of Zinc, Alu, MAgnesium and Copper It is much harder than tin - you know that stuff from the Denix guns I think.
3. Third step: carve two small air pipes into the gypsum block and an inlet opening on top for the tin. WARNING: MAKE SURE YOUR GYPSUM IS REALLY REALLY REALLY DRY BEFORE YOU POUR MELTED TIN INTO YOUR FORM !!!! DANGER OF EXPLOSION - NOT FUNNY !!!!!
4. Fourth Step: Cleaning and Trimming: trim the cap until it fits your gun.
Your form is actually a "lost form" - that means you can use it only once maybe twice if you are carefully enough when you remove the tin butt cap out of the form.
Now onto the other parts of the gun:
For the side inlay I used "forming sand" ($20 bucks with steel frame & some Talcum powder) This process is cheap and very easy to handle.
I did both side plates and the thumb rest in the same fashion: make sure you remove the "Disney" logo before you cast.
Completed Side Plate:
Trigger Guard
Trigger, Hammer and plate:
Now onto the barrel: The thing in the sand mold is the slightly modified cut end of the Zizzle barrel. I hot glued a tube under the plastic barrel, put the orange tip on top and inserted a stick of bamboo wood.
Added the upper frame and filled it:
Dried and removed from mold:
Removed the sand and the bamboo stick:
Cleaned it up:
And test fit it on the Zizzle toy:
Now that all of the metal parts are cast, it's on to the wood work and the body
However, now that I have started the wood process, I am realizing that I need to recast all my metal parts to fit this body. So here are my new recasted pieces:
The side lockplate is going to be hand etched on painted brass:
Etching procedure with an air compressor
Final result: The plan is to copy that etched brass plate in Zamak for the lock plate:
Here is the cut away in the wood for the detail:
Here is the completed plate and hammer:
Here is a video I made that shows the functionality of the hammer: http://www.youtube.com/watch?v=gQfIa1Nt9dI
if you would like to add information or you find dead links to pictures or sites please send an email to the administrators